Install Arlopass
Two components, under 60 seconds. Install the browser extension to manage AI access, then add the native bridge for local models and advanced features.
Browser extension
The extension lives in your browser and manages connections between web apps and your AI providers. Install it from your browser's official store.
Install from the Chrome Web Store. Works with Chrome, Brave, Arc, and all Chromium-based browsers.
Install from the Edge Add-ons store. Full compatibility with the Chromium extension API.
Install from Firefox Add-ons. Uses the WebExtension API with native messaging support.
Native bridge
The bridge runs on your machine and securely routes requests between the extension and your AI providers. It enables local model support (Ollama), HMAC authentication, and enterprise policy enforcement.
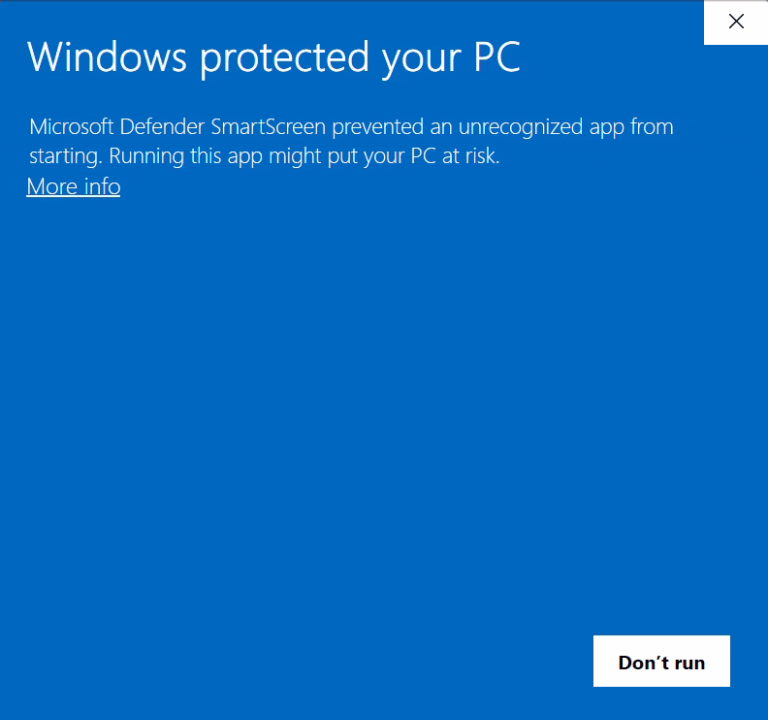
The bridge isn't code-signed yet. After downloading on Windows, follow the steps above to whitelist Arlopass.
One‑line installer
Downloads the latest release from GitHub, verifies the SHA-256
checksum, installs to ~/.local/bin, and
registers the native messaging host for Chrome, Edge, and Firefox.
curl -fsSL https://arlopass.com/install.sh | sh curl -fsSL https://arlopass.com/install.sh | sh -s -- --uninstall PowerShell installer
Downloads the latest release, verifies SHA-256, installs to %LOCALAPPDATA%\Arlopass\bin, and sets up native messaging host registry entries.
irm https://arlopass.com/install.ps1 | iex irm https://arlopass.com/install.ps1 | iex -Uninstall You're all set
Open the Arlopass extension, connect your first AI provider, and start using AI on your terms.
Connect a provider
Add your Ollama, Claude, GPT, Gemini, or Bedrock credentials. Keys stay in your encrypted vault on this device.
Visit an Arlopass app
When a web app requests AI, you'll see a clear prompt. Pick your model, approve, and go.
Read the quickstart
Developers: integrate Arlopass into your app in about 10 lines of TypeScript.
Read the quickstart →